
Build a simple digital thermometer with Arduino is fairly
easy. You only need to buy a cheap LM35 temperature sensor and upload sketch (firmware)
to handle the sensor within Arduino. This sketch was pretty simple because it
only consists of a few lines. I’m sure you are able to develop it in less than
5 minutes only :) .
Simply perform the following three steps then you can already make a simple
digital thermometer using Arduino and LM35 temperature sensor.
Step by Step Build Simple Digital Thermometer Using Arduino and LM35
First, prepare materials experiment as follows:
1. Arduino (Uno)
2. Jumper cables
Female to Male (F-M), 3 pcs
3. LM35 temperature sensor
4. USB cable
type A-B to upload a sketch and used to a voltage sourcing for Arduino at once
Second, Connect the jumper cables F-M to LM35 pinout with the
following configuration

Third, upload the following sketch to the Arduino, via the Arduino
IDE software default (you can download at arduino.cc).
float ftemp;
int tempsensor = 1;

void setup()
{
Serial.begin(9600);
}

void loop()
{
 ftemp = analogRead(tempsensor);
 ftemp = ftemp * 0.48828125; //(5V * 100C)/1024
 Serial.print("TEMPERATURE = ");
 Serial.print(ftemp);
 Serial.print("*C");
 Serial.println();
 delay(1000);
}
Already finish :) ,
your digital thermometer is already use. To view the measurement results,
please select Tools-Serial Monitor menu.
If unreadable characters are displayed there, meaning its baudrate not yet set.
First, please configurw baudrate in Serial Monitor windows in the bottom right
corner of the window with the numbers 9600 bps in accordance with the sketch
you uploaded earlier.
If everything is ok, you will got view something like this
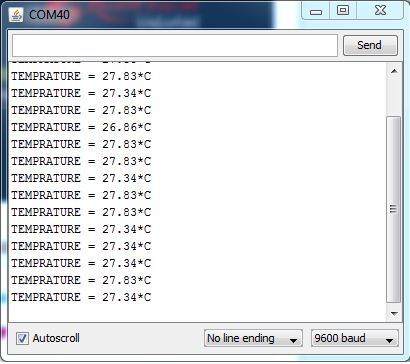
Very easy, right? You can enhanced this experiment with
7-segment or LCD 16x2 display instead of Serial Monitor window (laptop). I’ll write
tutorial for this but in next time. Stay tune on my blog :)
A blogger, electro-hobbyst, freelancer n technopreneur. I'm an Indonesian, I did my best to make tutorial without spelling errors, please CMIIW or if something burned your eyes..
ConversionConversion EmoticonEmoticon